 Urban life can be unpredictable. Power outages, transit shutdowns, water main breaks, and natural disasters might sound rare, but in a city, these things happen more than most people think. Having a personal survival kit brings peace of mind, without draining your wallet.
If prepping seems expensive or complicated, I get it. There are loads of fancy gadgets marketed as urban survival gear, but you actually don’t need to spend much to be prepared. A basic but reliable kit can be pulled together on a budget by focusing on core needs and a little know-how.
Here’s a practical guide for building your very own urban survival kit that covers all the basics, keeps things affordable, and fits easily into daily life, whether you commute downtown, live in a small studio, or just want to be ready for whatever the city throws your way.
1. Start With the Basics: What Does an Urban Survival Kit Need?
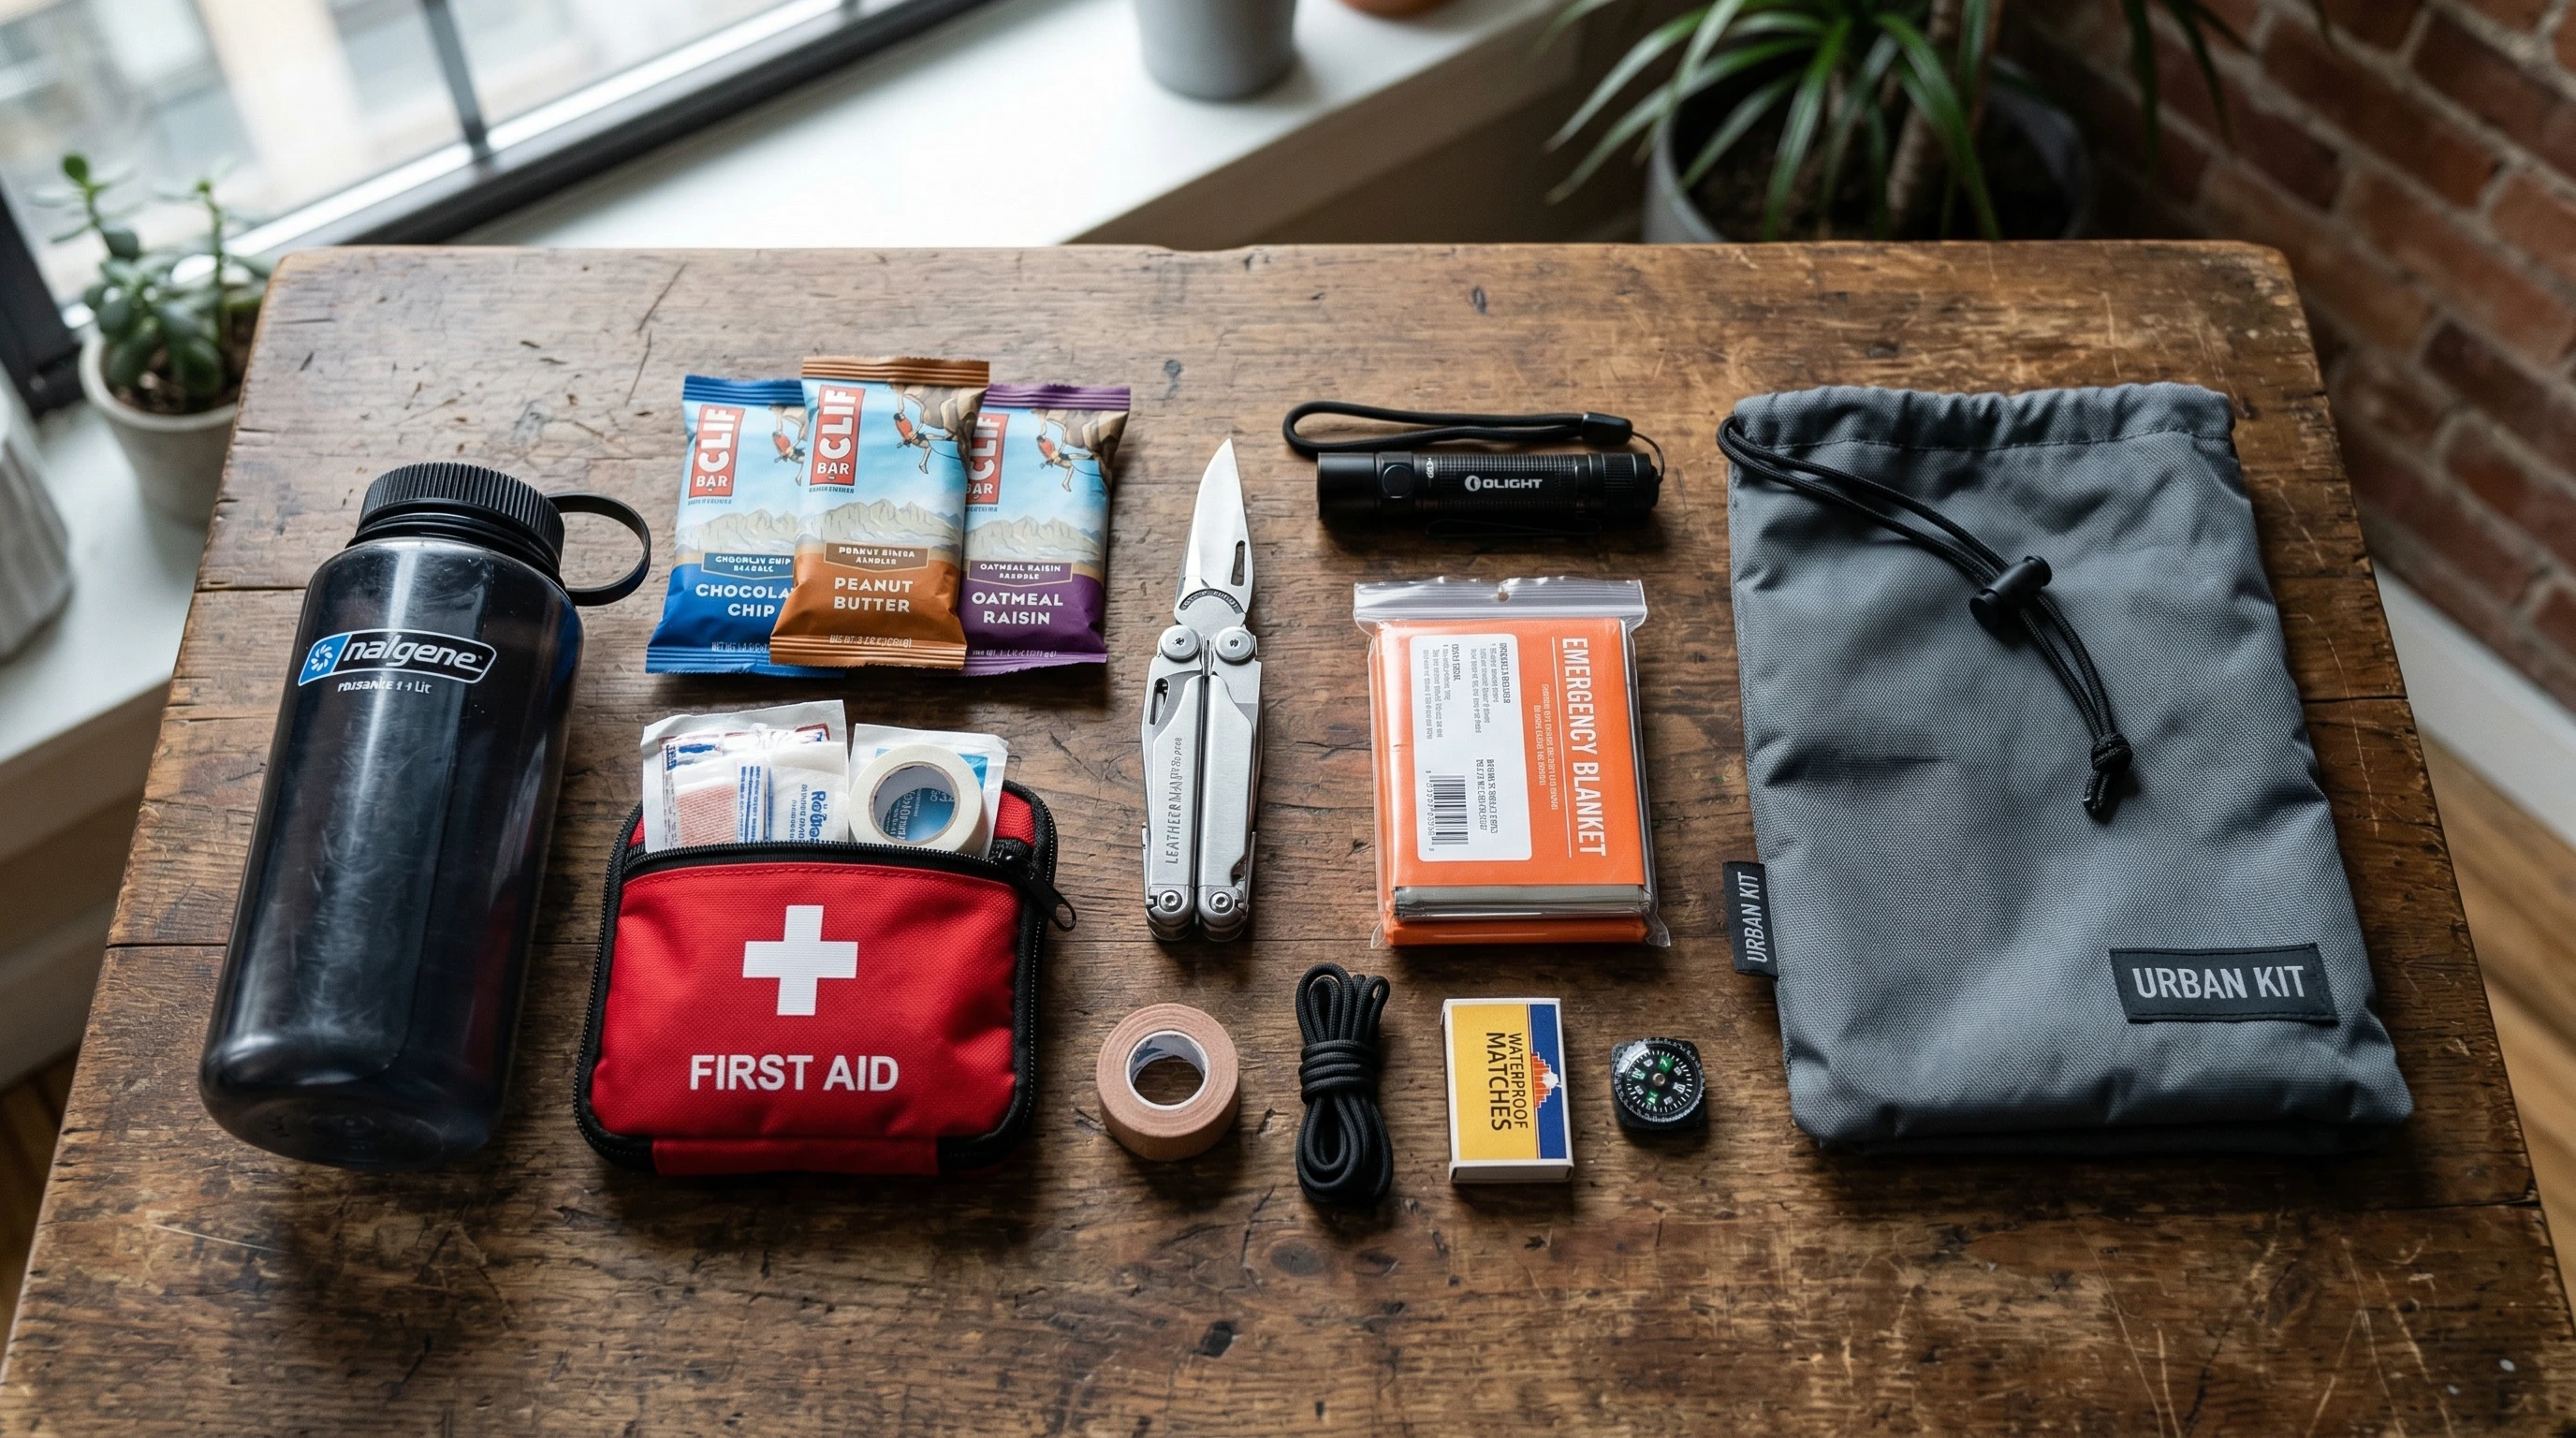
The idea behind a survival kit is being ready for events that interrupt daily life or basic services. In the city, this means less wilderness equipment and more gear for common threats, like power cuts, stuck elevators, transit delays, or sudden evacuation orders.
- Clean Water – Bottled water is an easy start. Emergency water pouches and a compact water filter are both super useful and pretty cheap.
- Nonperishable Food – Granola bars, nuts, dried fruit, or canned fish. Pick lightweight, high-energy options with long shelf lives.
- First Aid – A basic first aid kit with bandages, antiseptic wipes, and pain relievers gets the job done for small injuries.
- Light Source – Power outages happen. A small LED flashlight or headlamp, plus extra batteries, is really important.
- Multitool – Doesn’t have to be namebrand. Look for deals on models that include pliers, screwdrivers, and a knife.
2. Affordable Options for Every Category
Building a useful kit on the cheap means skipping fancy brands. Drugstores, dollar stores, and big box retailers usually have plenty of solid options. Thrift shops can be surprising sources for bags, pouches, or even older camping gear.
Water
- Storebought bottled water is cheap and reliable. Rotate bottles every 4-6 months.
- Look for mini water filters online or in the camping aisle; these don’t cost much and can fit in your pocket.
Food
- Buy snacks when they’re on sale at the grocery store and toss a handful in your bag.
- Pick shelfstable items, and swap out older food every few months so nothing goes bad.
First Aid
- Prepacked kits at dollar stores or pharmacies come with the basics. Add in any personal meds you need.
Light
- LED keychain lights or basic flashlights are available for a couple of bucks.
- Spare batteries should always be a backup; keep them in a zip bag to avoid corrosion.
Tools and Extras
- Multitools often go on sale, especially noname versions. Check hardware stores for markdowns.
- Add a couple of zip ties, a small roll of duct tape, or a mini screwdriver if you have extras at home.
3. Don’t Forget These Overlooked Items
Some cheap but practical items get missed, but they’re pretty handy during emergencies. Here’s what I like to toss in my kit, all for just a couple of dollars each:
- Whistle – Great for signaling in power outages or if you’re stuck in a building.
- Portable charger (power bank) – Look for a budget version to keep your phone running if the power’s out.
- Emergency blanket – These metallic looking blankets are lightweight, compact, and cost about the price of a coffee.
- Mini notepad and pen – Super useful for leaving notes or sharing information if the cell network is down.
- Copies of ID and contact info – Print or write down key phone numbers and a copy of your ID, just in case your phone dies.
4. Choosing the Right Bag: Cheap, Compact, and Practical
No need for a military backpack. I use a basic drawstring gym bag; it’s lightweight, cheap, and easy to stash under a desk or in a locker. Some people use a large zippered pouch, messenger bag, or even a sturdy plastic container for at-home kits.
The trick is to pick something you’ll actually carry. Make sure it fits the key items listed above, plus any extras you want for comfort.
5. Packing Tips to Maximize Space (and Budget)
- Use plastic sandwich bags to group similar items (first aid, snacks, batteries). Keeps things organized and dry.
- Roll up the emergency blanket and sandwich it between other items to save space.
- Keep heavy stuff (like water) at the bottom and soft items (like a bandana or gloves) at the top.
If you like, put together a small kit for your work bag and a bigger one for your apartment or car. A couple of duplicates (like a flashlight or bandages) never hurts.
For extra organization, consider using mesh pouches or an old toiletry bag to separate your kit inside a larger bag. It will make things much easier to find when you need them quickly, especially during an emergency situation. Labeling the bags can also help family members or coworkers locate items without confusion.
6. BudgetFriendly Shopping Resources
- Dollar stores – Flashlights, batteries, snack foods, and small first aid kits are often cheaper than anywhere else.
- Online deals – Search phrases like “budget survival gear” or “cheap first aid kit” on big box websites or discount retailers.
- Community swaps/thrift shops – Sometimes people donate unused or barely used gear. Worth checking out for bags, blankets, and small organizers.
Even big department stores have a camping or travel section. Offseason sales (after summer or hiking season) are the best time to grab bargains. It’s also a good idea to ask around in your circles. Sometimes, friends have spare supplies left over from trips or events they’re willing to give away or sell for a very low price.
7. Personalizing Your Kit: Everyone’s Needs Are a Little Different
Living in a big city, your daily routine shapes what you might need. For example, if you take public transit, it’s smart to pack an extra face mask and some hand sanitizer. If you have allergies or important medication, add a few days’ supply in a labeled container as a backup.
If you have pets, toss in a small packet of food and a collapsible bowl. Parents might want a couple of diapers, wipes, or kid snacks.
Think about your work and commute hours. If you spend a lot of time in offices or crowded places, adding extra tissue packets, basic hygiene items, or even a pair of earplugs might make emergencies or delays much more bearable. Those little comforts can make a huge difference.
8. Keeping Your Urban Survival Kit Ready
Kits only work if they’re up to date. Check every three months; swap out expired snacks, replace old water, and check that your batteries still work. Jot down a reminder in your calendar or put a note on your fridge so you don’t forget.
Running a quick test on your flashlight or power bank every so often can prevent disappointment during an actual emergency. Make it a routine, like replacing smoke alarm batteries or flipping the mattress—small checks that pay off big time. Consider doing this at the start of each new season or after major city events.
Wrapping It All Up
An urban survival kit doesn’t have to be complicated or pricey. With a focus on what really matters, such as water, snacks, first aid, light, and a good bag, anyone can build a solid kit for under $40, sometimes even less. Add a few personal extras, check it every so often, and you’re good to go.
Feeling prepared is worth way more than any piece of gear. If you put your kit together and tweak it over time, you’ll always be a step ahead, no matter what surprises city life sends your way! Remember, being calm and ready makes a huge difference during tough moments—and peace of mind is truly priceless in any urban adventure.